
A texture is essentially just a regular image. The reason for images in 3D materials being called textures is because they make up the textured surface of a 3D object. A texture is typically an image or a photo of a real-life textured surface such as wood, concrete, rocks, or leather. The term texture also makes it easier when searching for similar images online. Here are some typical examples of textures.

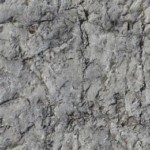
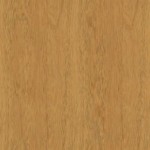
And below is what the texture images may look like when wrapped on various 3D objects in Chathouse Room Editor.
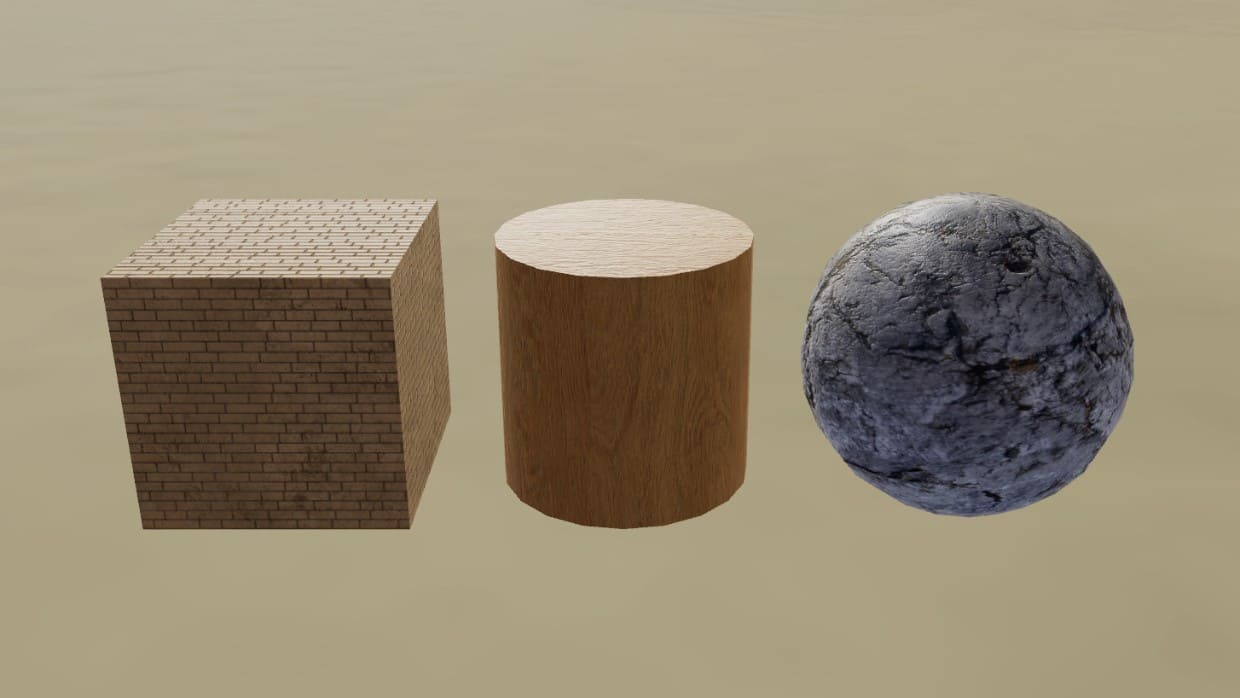
Texture images to use on 3D objects in room editor can be found at Gamerotica, in the list at the bottom of this article, or simply by searching for texture images in your browser.
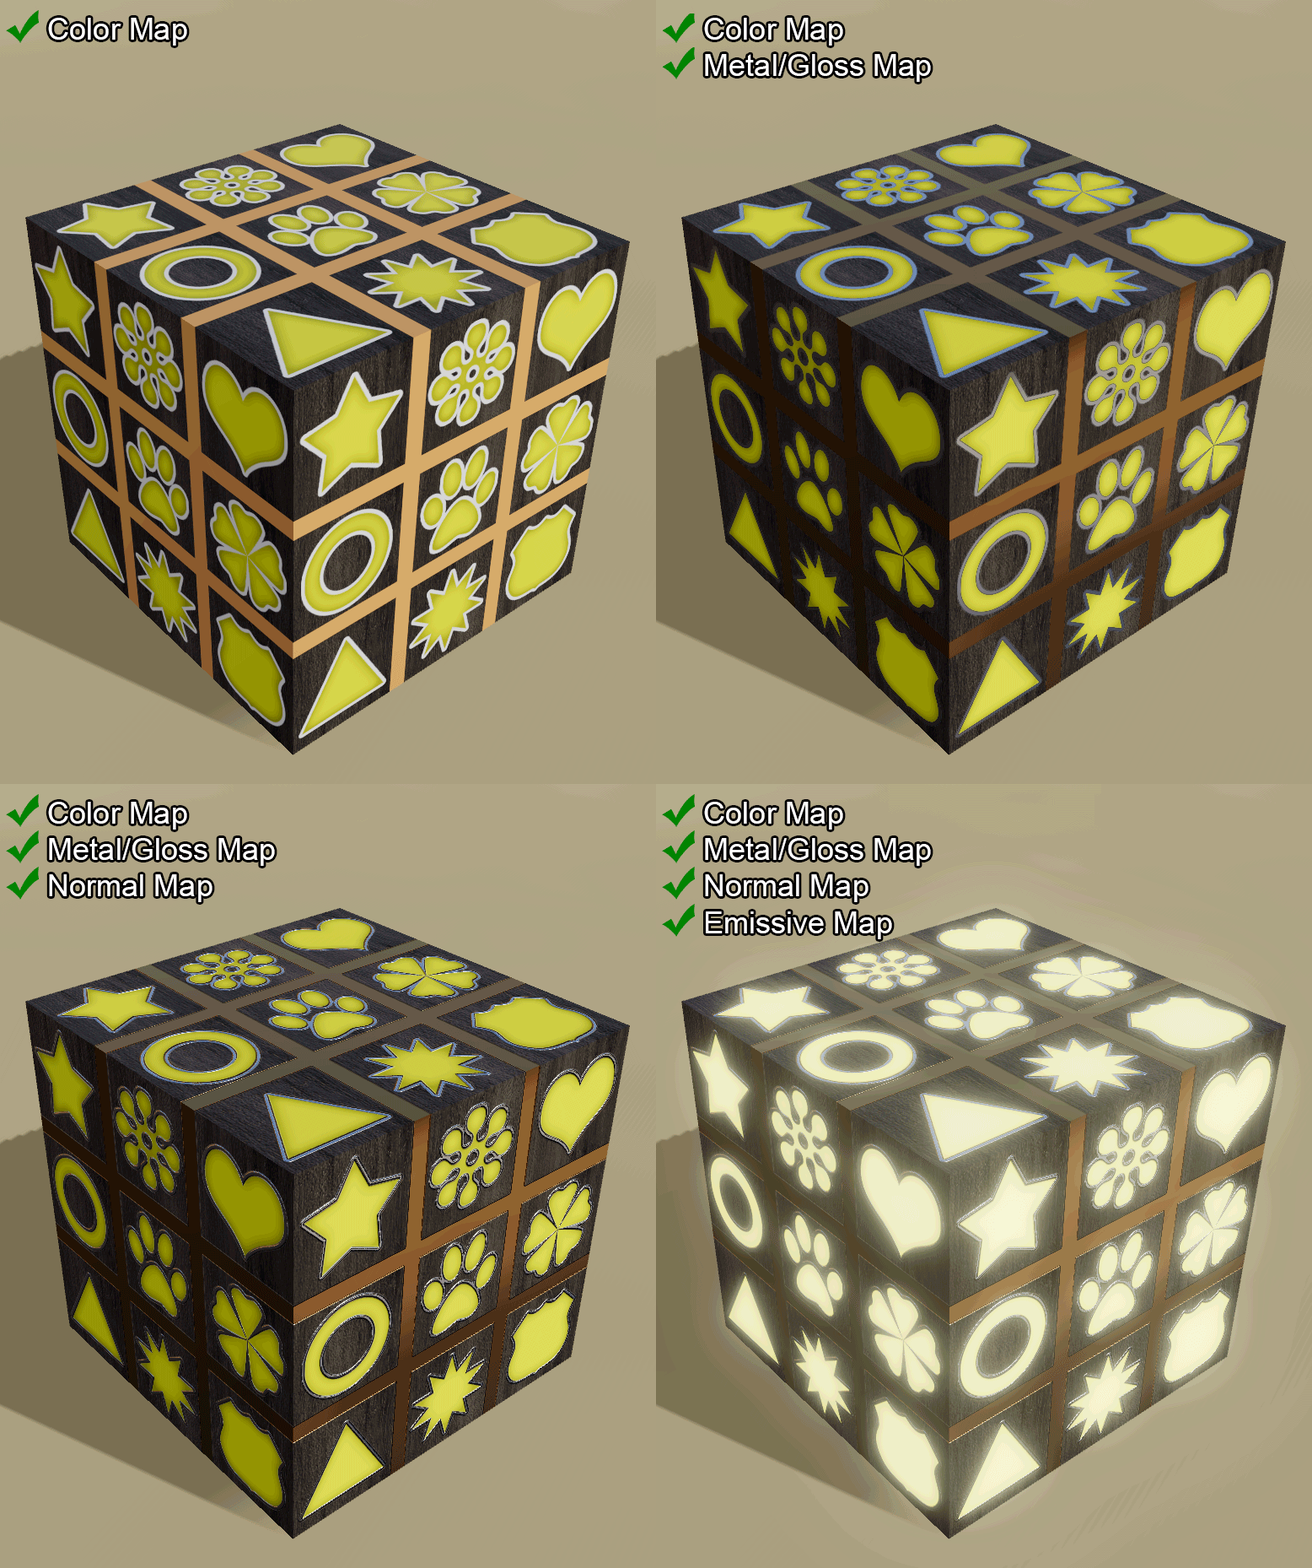
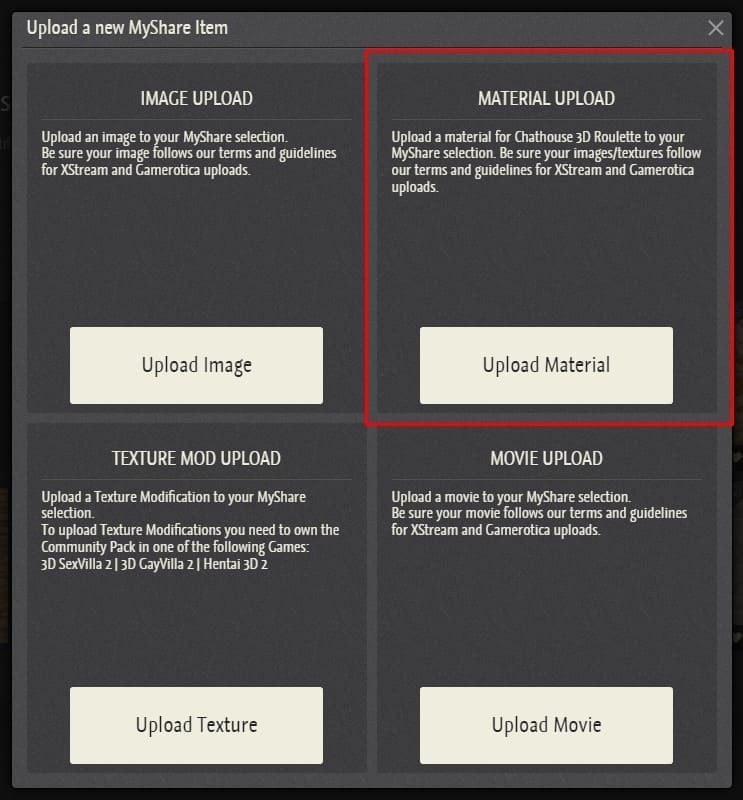
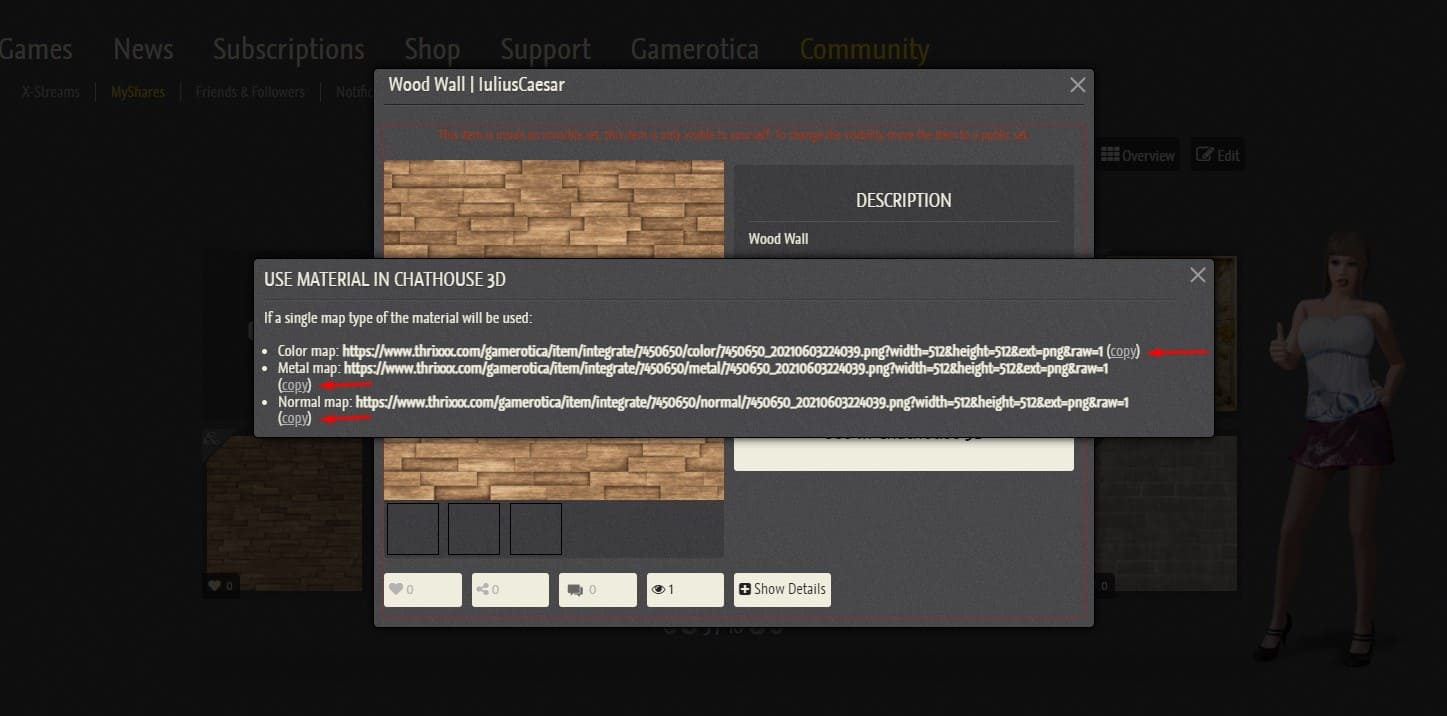
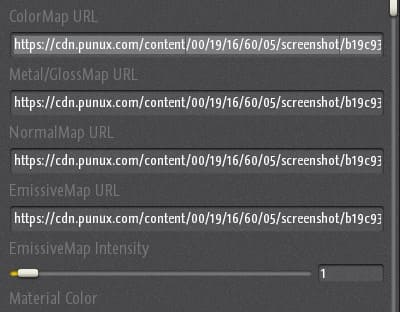
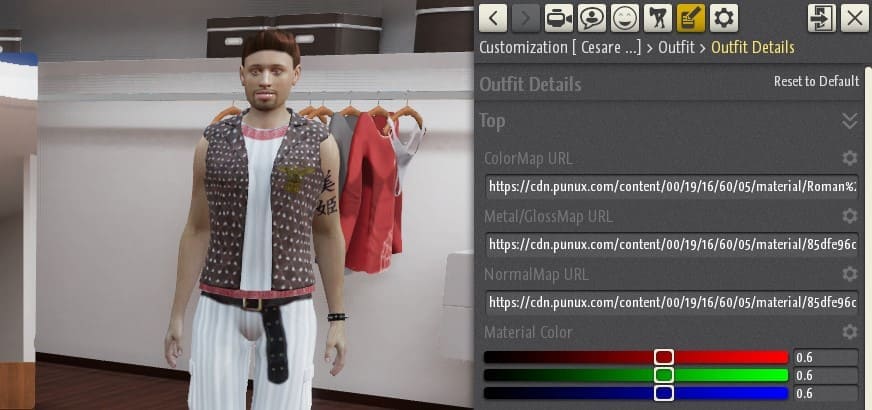
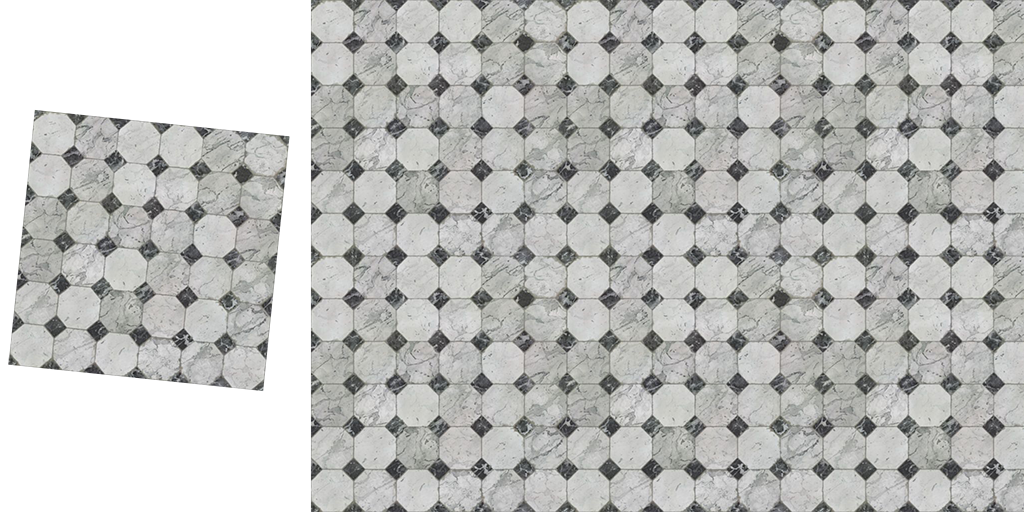
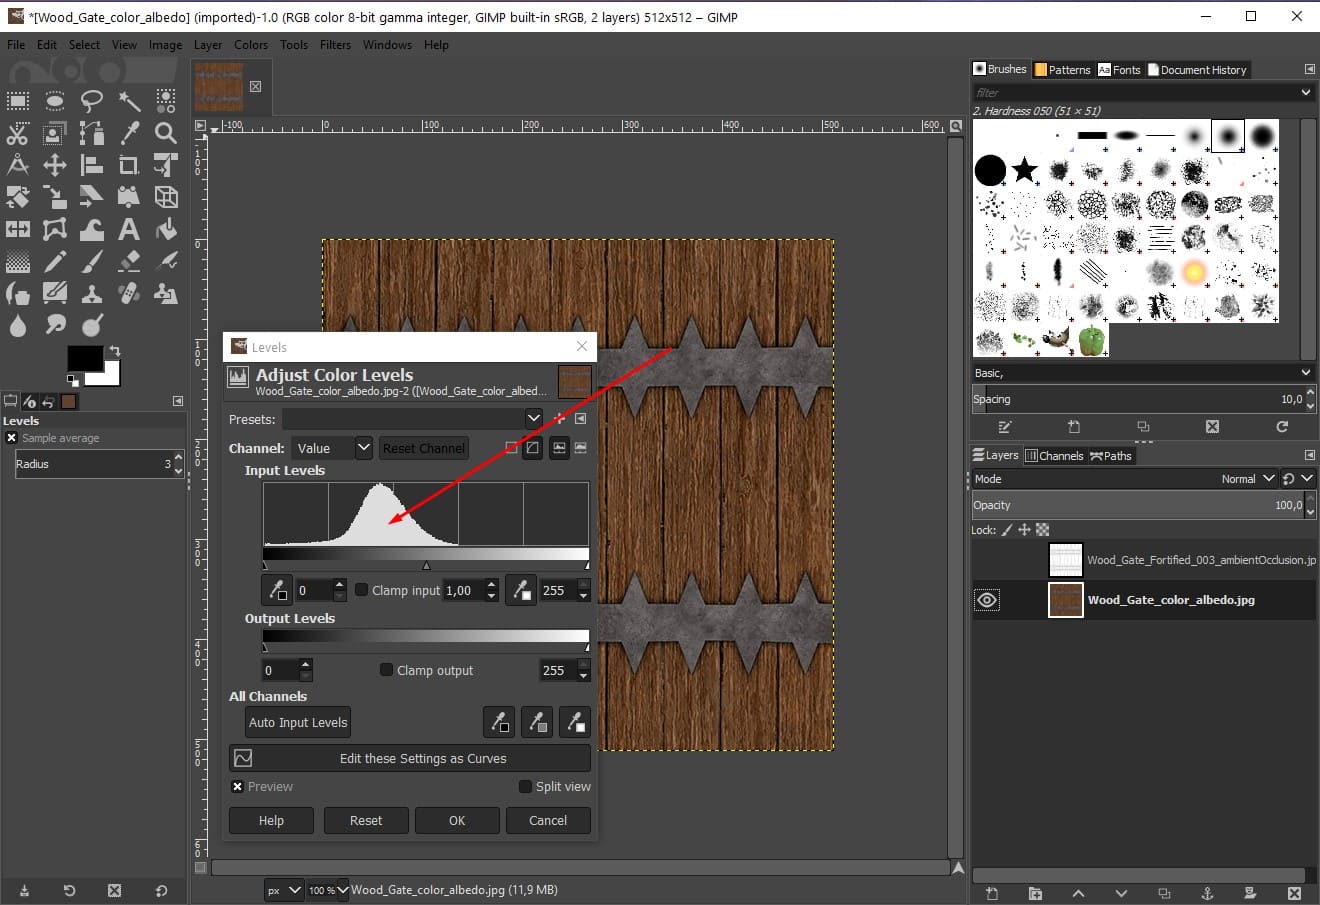
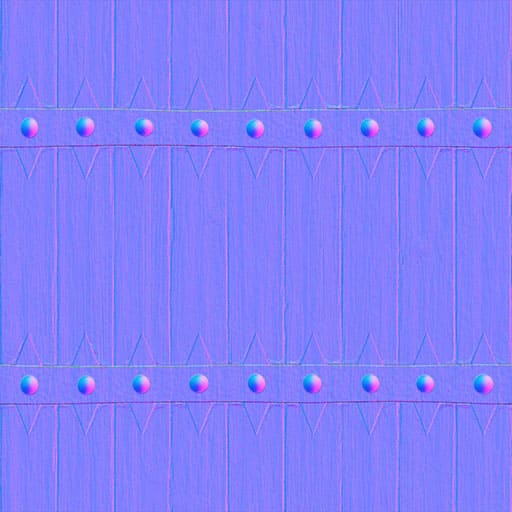
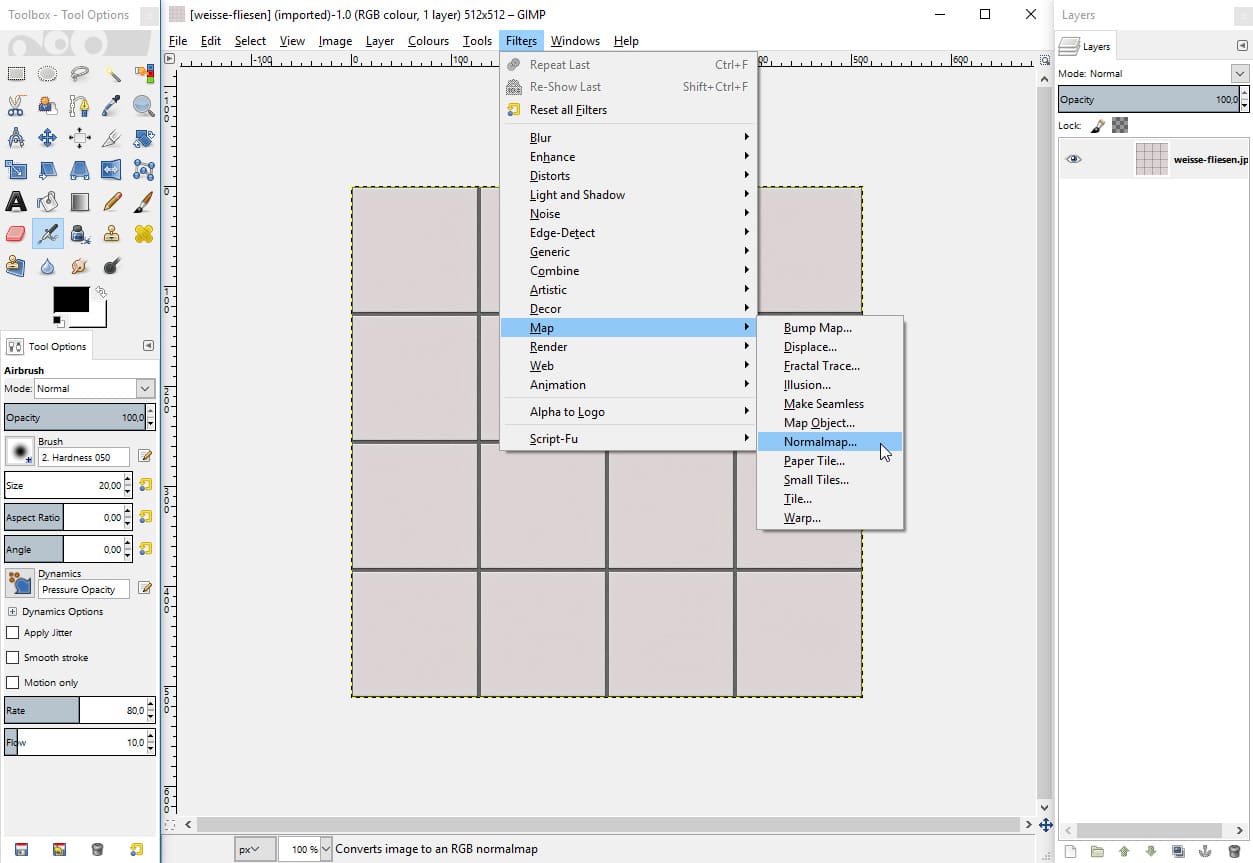
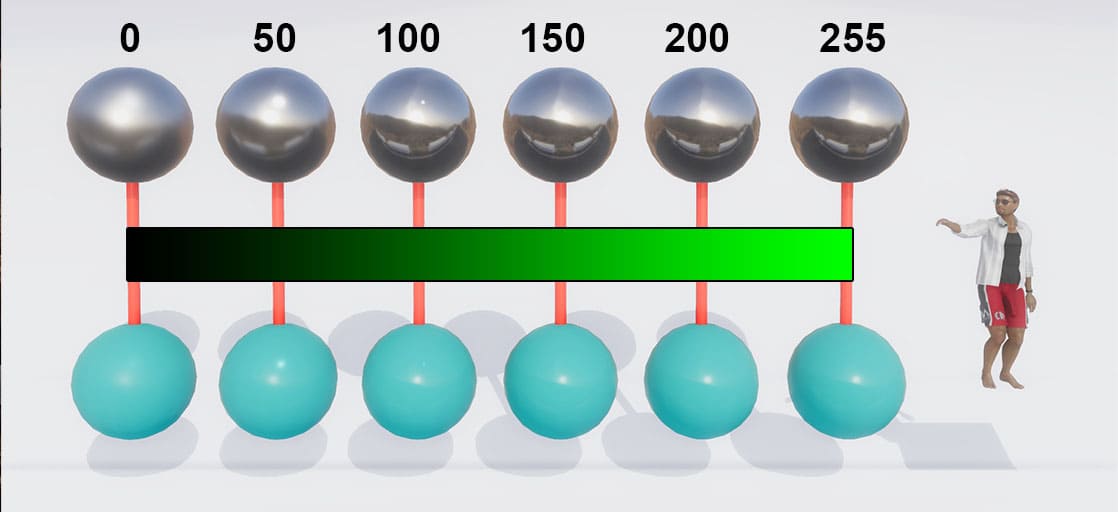
Types of textures Chathouse uses four different kinds of textures. Below is an object that use all the four texture types available for 3D objects in Chathouse – color map, metal/gloss map, normal map and emissive map. Color Map Metal/Gloss Map Normal Map Emissive Map Note that emissive maps look better in dark rooms. Much like real life neon signs look better in the dark. Materials Both clothes and objects in room editor access texture files by regular URL links to image files. Assigning textures to objects is typically done by copy and paste of browser links to images. Note that any textures you use must be on Gamerotica or your MyShares. Go to your Myshares and upload a new material by clicking the “+” button” Uploaded materials can be easily accessed by clicking “Use in Chathouse 3D”. Simply click “copy” and paste the links into room editor. To use your own textures on clothes you need to go to “Edit Characters” from the Lobby menu. Then navigate to Outfit > Outfit Details and paste your texture links. All clothes including customizable items are available to subscribers. Basic need to purchase the customizable clothes from the shop’s “Gear” section. Maximum image size for clothing textures is 1024×1024 pixels. You are allowed to use JP2, JPEG, PNG, GIF and WebP as texture images with a 5MB maximum file size. Please make sure all images follow our Terms of Service. Basic knowledge of textures is necessary to fully comprehend this tutorial so we suggest you read the above chapters on basic texturing first. General Considerations – File size: The room loading time will be dependent on your textures file size. Consider using as small files as possible. – Image size: Image maximum size is 1024X1024 pixels for universal objects, 2048×1024 for the Sky background and 1024×576 for Picturewalls, anything bigger will be scaled down. – File format: You are allowed to use JP2, JPEG, PNG, aPNG, GIF and WebP. Each have their strong points and issues. JPGs offer the best compression at the expense of quality. PNGs offer the best quality especially when the texture is repeated. – Animations: Textures can also be animated. Be aware that animated textures may have a major impact on performance. Use as few animated textures as possible. Using animations on Metal/gloss and Normal maps will add a considerable workload on your CPU so it is never advised. – Seamless Textures: Most textures that you find in the repositories are seamless. A seamless texture (AKA a “tileable texture“) is an image that can be scaled over an object without creating a noticeable seam. Texture scaling allows you to maintain the correct proportions within the image and avoid losing quality when the same texture is stretched over a large surface. You can see an example of correct texture scaling above. All the details on the texture scaling function are in this article dedicated to universal objects in room editor. General Suggestions As a general rule, we suggest you use 512X512 pixel textures for most materials. This is the best compromise between performance and quality. Use 1024X1024 (1K) textures only for those materials where a higher level of detail is absolutely needed. We suggest you use the PNG format which allows better quality (especially when textures are repeated). The downside is a bigger file size. Consider compressing PNG files before uploading. A file size above 1MB for 1K textures and above 500KB for 512X512 ones is not advisable. In order to optimize performance we suggest you consider using JPG textures on 1K images, especially on Metal/gloss and Normal maps Types of textures you can find online Here’s a list with the description of the most common maps you can download from the internet. 1. Color Maps which may be also called Diffuse or Albedo. Albedo refers to a map with no trace of any shadow and are usually the best ones since the game engine will add shadows to them. 2. Height Maps only portray height differences. Black is ‘down’, white is ‘up’, and 0.5 gray means no change of height. It can be used with the bump mapping technique (and hence the map itself is also called a bump map) to calculate where the 3D data would create shadow in a material. That is the old school way of adding detail to objects. We don’t use them in Chathouse but they are perfect to create Normal maps with the appropriate software. 3. Normal Maps are a special kind of textures that allow you to add surface detail such as bumps, grooves, and scratches to a model. They have a typical blue/purple look. There are two versions of Normal maps: Open GL and DirectX. The ones we can use “out-of-the-box” in Chathouse (the OpenGL ones) have red light coming from right and green light from above. Make sure they look like that or the final result may look weird. They are ready to be used in Chathouse. 4. Roughness Maps control the sharpness of the reflections adjusting the glossy appearance of the surface. The terms Gloss and Roughness are interchangeable, they are simply inverts of each other. They are greyscale images. These are the textures we can use as a starting point to create Metal/gloss maps in Chathouse. Gloss should be represented in white and matt in black. 5. Metallic or Metal Maps are black and white textures that act as a mask that defines areas on materials that behave like a metal (white) and do not (black). 6. Emissive Maps (AKA Fullbright Maps, Glow Maps, Incandescence Maps, or Self-Illumination Maps) are textures that are always shown at full intensity. These are used for a glow in the dark effect, but do not emit light onto adjacent surfaces. Their effect is more visible as the location gets darker and can be adjusted with a slider in Room Editor. These maps can be used without any need of editing. Color Maps Color maps from online repositories are usually ready to use in Chathouse. When representing metallic objects, always consider using lighter colormaps. In GIMP you can check the median luminosity clicking on colors -> levels like in the image below. As a general rule consider a 180-255 RGB value range for metallic objects, while non-metallic ones will be best represented with a 50-240 range. That means, go much brighter with metallic objects! If you have access to an ambient occlusion texture you may also want to add some more detail to your color maps. This works best with albedo textures which have no shades at all. To do that, just add the ambient occlusion texture as a layer on top of the colormap and use multiply blending mode. You can play with opacity to get the result you like the most. You can see an example in the image below. On the left you see a color map with no shades (albedo). Many details are missing but they will be added by the normal and metal/gloss maps. On the right you can see the final effect of blending the ambient occlusion texture over the color one to add some details. It is usually not necessary, just do it if you really feel you need to add some “punch” to your texture. The last step is always about optimizing image size, file size and format as explained in the previous articles. Normal Maps Normal Maps have their typical blue/purple color. Creating a Normal map by hand is quite complex and time consuming. Normal maps from the repositories mentioned above are usually best optimized, so there will be no work to do. When using normal maps for Chathouse please remember to make sure that red light comes from right and green light from above as in the example above. You can also create a Normal map from a Bump map using GIMP and its Normal map Plugin (links at the bottom of this article). That is most useful when you cannot find a proper Normal map for your material, but you have the Height or bump map. Then select “Filters>Map>Normalmap…” in GIMP and a window will pop up. The most important options in the Normalmap window are “Invert X”, “Invert Y” and “Scale”. Once created the Normal map click on “File>Export as” and save the image. Metal/Gloss Maps Metal/Gloss maps setup is unique to Chathouse and you will not find any online outside of ThriXXX or Gamerotica. Red is assigned to the metallic effect: 0 is non-metallic, 255 is full metallic The correct use of a metal/gloss map is on objects where gloss and metal effects are very differently represented throughout the whole object, for example, a pair of pants: the fabric is non-metallic and not very shiny, the leather belt is glossy and the buckle is very metallic. If your material is very uniform, you may want to control metallic and gloss property with the sliders in game. In the following example we consider a set of textures downloaded from the internet. The material is made of wood and metal. They have very different properties since metal is very metallic and shiny, while wood is non-metallic and quite dull. We will need to work on these 2 components separately. The image below can be used as a reference for green levels in different materials. You can see some examples ranging from dull (left) to full shiny (right) applied to both metallic objects (upper line) and non-metallic ones (lower). For the metallic part the best texture to start with is the Metal map(1). We use it as a reference to cut out the parts that are not metallic (2) and we will play with red and green levels to create the correct metallic and glossy effect (3). In this case they will both be high so an orange/yellow color will be the result of our editing (4). The exact same concepts apply when we are creating a texture from scratch. Emissive Maps Emissive Maps are not very common, so you will probably need to make your own from scratch. When they are included in a set of textures they can be used without any editing. Texture libraries: Online image compressors: GIMP thriXXX Gamerotica @VelvetCrimson‘s collection of 512X512 textures @IuliusCaesar‘s collection of 512X512 PNG textures @IuliusCaesar‘s collection of 1024X1024 PNG textures @IuliusCaesar‘s collection of 1024X1024 JPG textures This article was written with the contribution of @VelvetCrimson and @IuliusCaesar
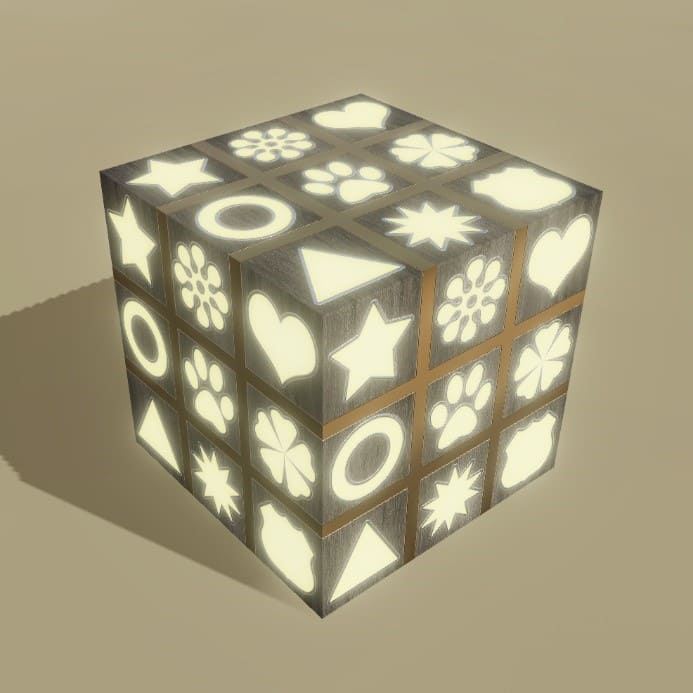
The color map texture is the basic visual look and design of a 3D object. It is the most important texture for any object. In many cases even the only texture needed.
Below is the object above with just the color map represented. Note the difference in depth, reflection and glow.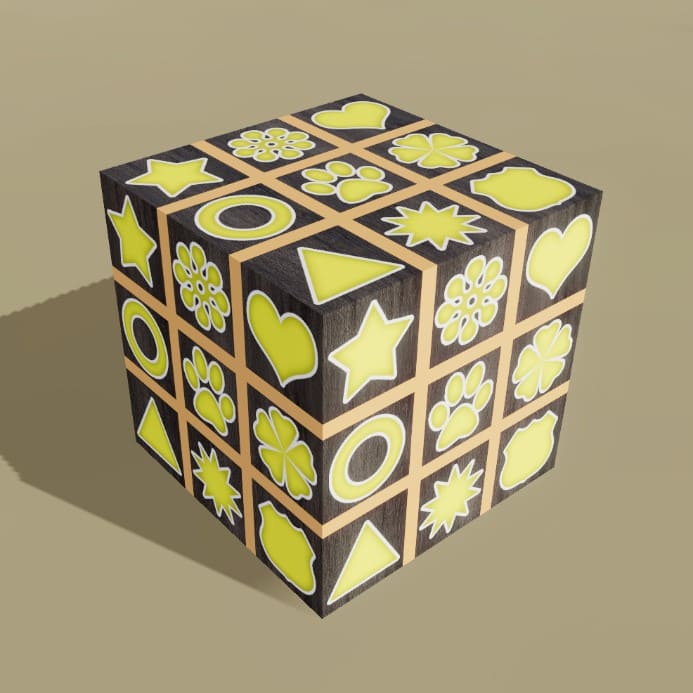
The metal/gloss map texture defines glossy and metal reflections areas over an object. A metal/gloss map is however rarely needed unless the object has distinctively different material parts. For example, a knife with a wooden grip and a metal blade. But for something like a table or floor entirely made of wood it will not have a significant use. Below is the object above with only the metal/gloss map represented. Note the outlined reflective areas.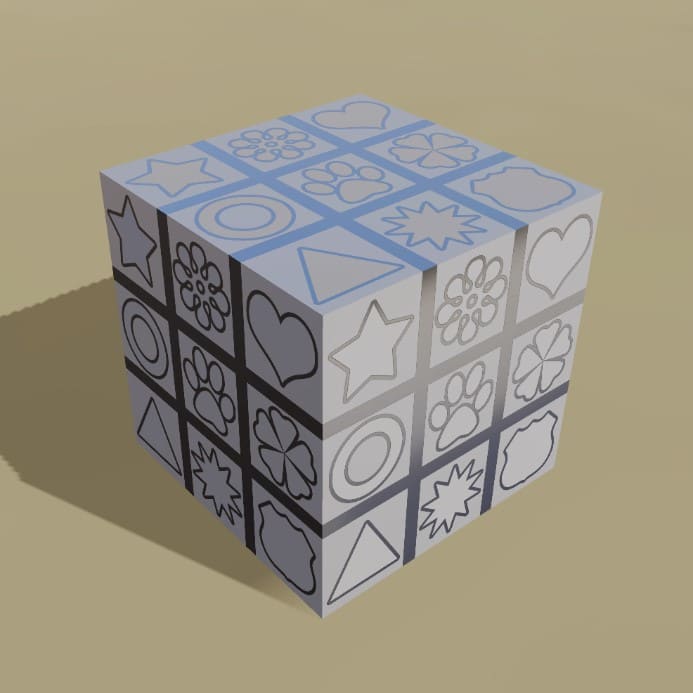
The normal map creates the illusion of a surface over the object. It is very effective with rough materials such as rock, concrete or bricks. Or with structures like floor tiles or ornaments. The normal map adds the feeling of depth and can often be essential for photo realism to objects. Below is the object above with only the normal map represented. Note distinctive surface depth.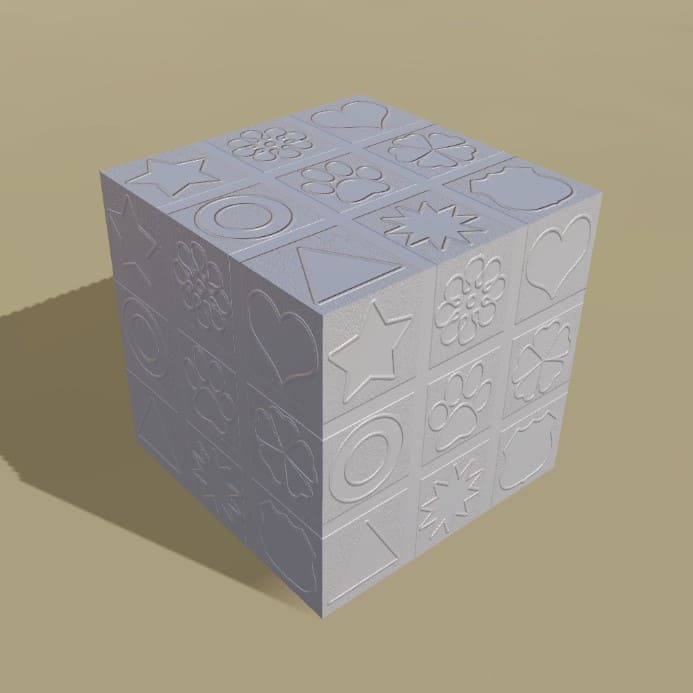
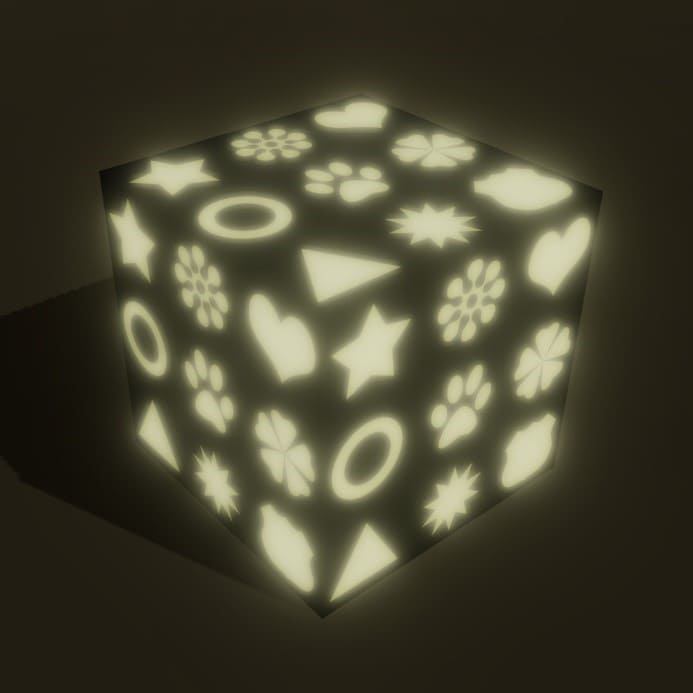
The emissive map creates an illusion of glow from areas over the object. It is useful for creating neon signs or tv screens. It’s a handy feature for glow effects but rarely needed at all for usual objects such as walls, floors, ceilings or furniture in a room. Below is the object above with only the emissive map represented.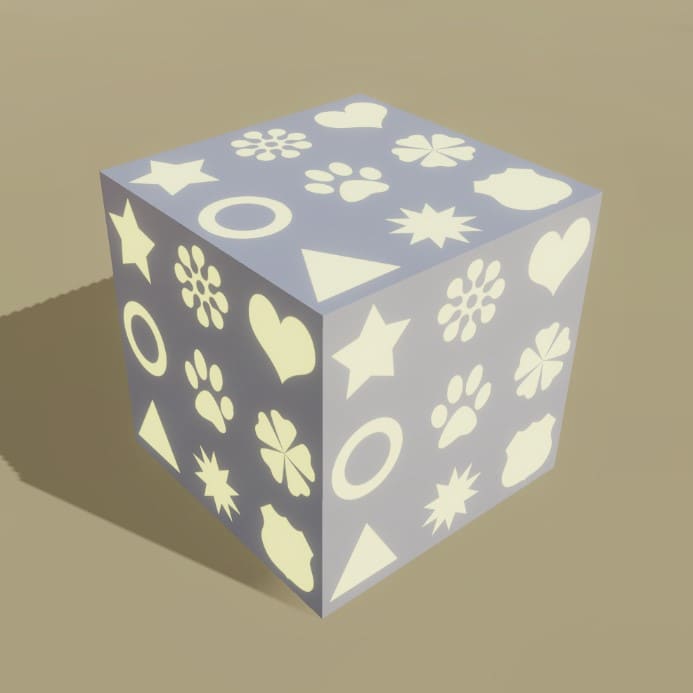
A complete list of materials ready to use and experiment with can be found on thriXXX here:
– 512X512 PNG textures (@IuliusCaesar). These are the textures you should mostly use.
– 1024X1024 PNG textures (@IuliusCaesar). These are the textures you should use as little as possible only when you really need a HD image.
– 1024X1024 JPG textures (@IuliusCaesar). These are JPG HD textures you can use when you need a HD texture but need to keep the file size low. For example, you may want to use a PNG image as color map and JPG images for metal/gloss and Normal maps.
– 512X512 PNG textures (@VelvetCrimson).
A complete list of useful links is available at the bottom of this article.
Advanced Textures: General Aspects
Creating textures requires an image editing software. We suggest GIMP since it is a powerful, free and open-source graphics editor.
We can create texture images in different ways. The easiest one, though, is to use repositories of textures that are available on the internet. You can find a short list of libraries that allow the use of their content for free for personal use at the end of this chapter. These links are just examples, there are many other sources you can find on the internet.
You can still upload textures at a lower resolution for performance reasons. For example, 512X512px textures are the best choice for most universal objects and sometimes you may even want to go as low as 16X16.
Universal objects work best with square textures (height/width ratio 1:1) with power of two width or height in the range between 16 and 1024 (16,32,64,128,256,512,1024).
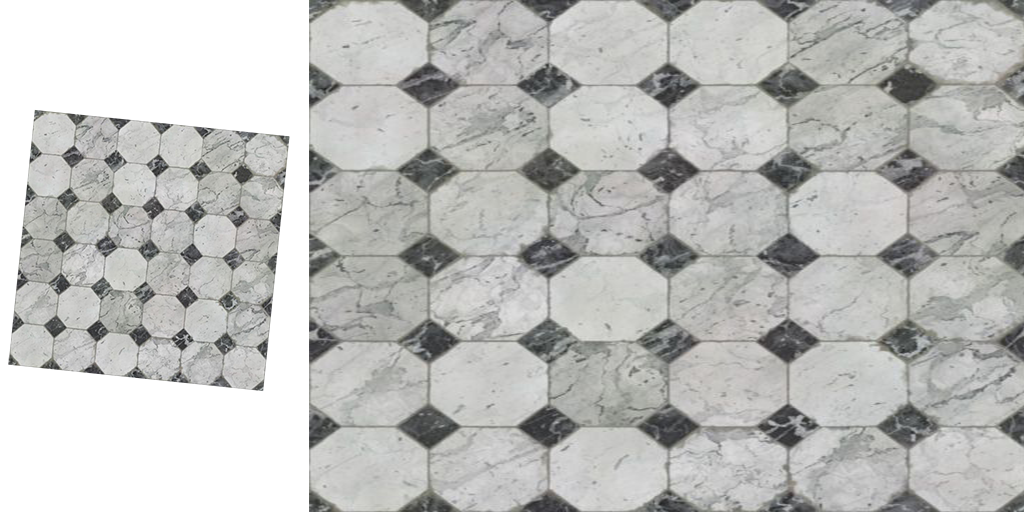
On the contrary, textures that are not seamless will have a bad impact on the final look as you can see below.
Advanced Texture Editing
You may want to play with brightness and contrast a bit. Consider that most often you will want to add a little brightness to the textures to work better in Chathouse.
Input levels indicate how bright the image is in a scale from 0 (dark) to 255 (bright). In this image the average brightness of the texture is around 80 (red arrow).

You can also create a Height map yourself, just remember these textures use a set grayscale to manipulate height. Black areas represent “sunken in” parts of the surface, white areas indicate parts that protrude and all the shades of grey in between work accordingly.
A correct Normal map features a green shine from above and red from the right side. (Example)
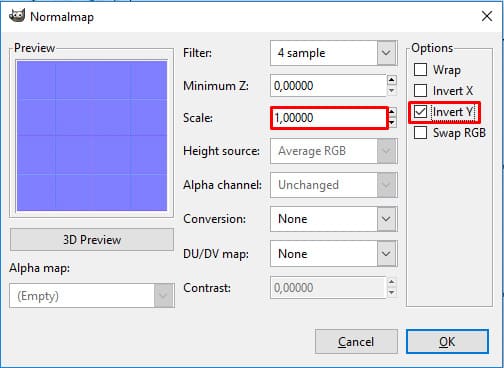
If this is not the case, you can flip the lights using “Invert Y” and/or “Invert X” and/or “Wrap” until you get the expected result.
The “Scale” sets the desired amount of height and depth. Most times a value between 1 and 12 is correct.
This kind of texture blends two different maps into one using the red and green channels (RGB).
Green is assigned to gloss/roughness: 0 is dull while 255 is fully shiny.
Blue must always be set to 0.
As a first thing we will use the gloss or roughness map to edit the glossy effect (or lack of). Since we are showing the glossiness of the material we need to invert a roughness texture (colors -> invert) while a glossy texture can work unedited.
In GIMP we will just have to load that texture and display the “Adjust color levels” window (colors -> levels from the menu). From there we will reduce the blue and red channels level to zero since blue is always irrelevant and red adds metallic effect which wood does not have.
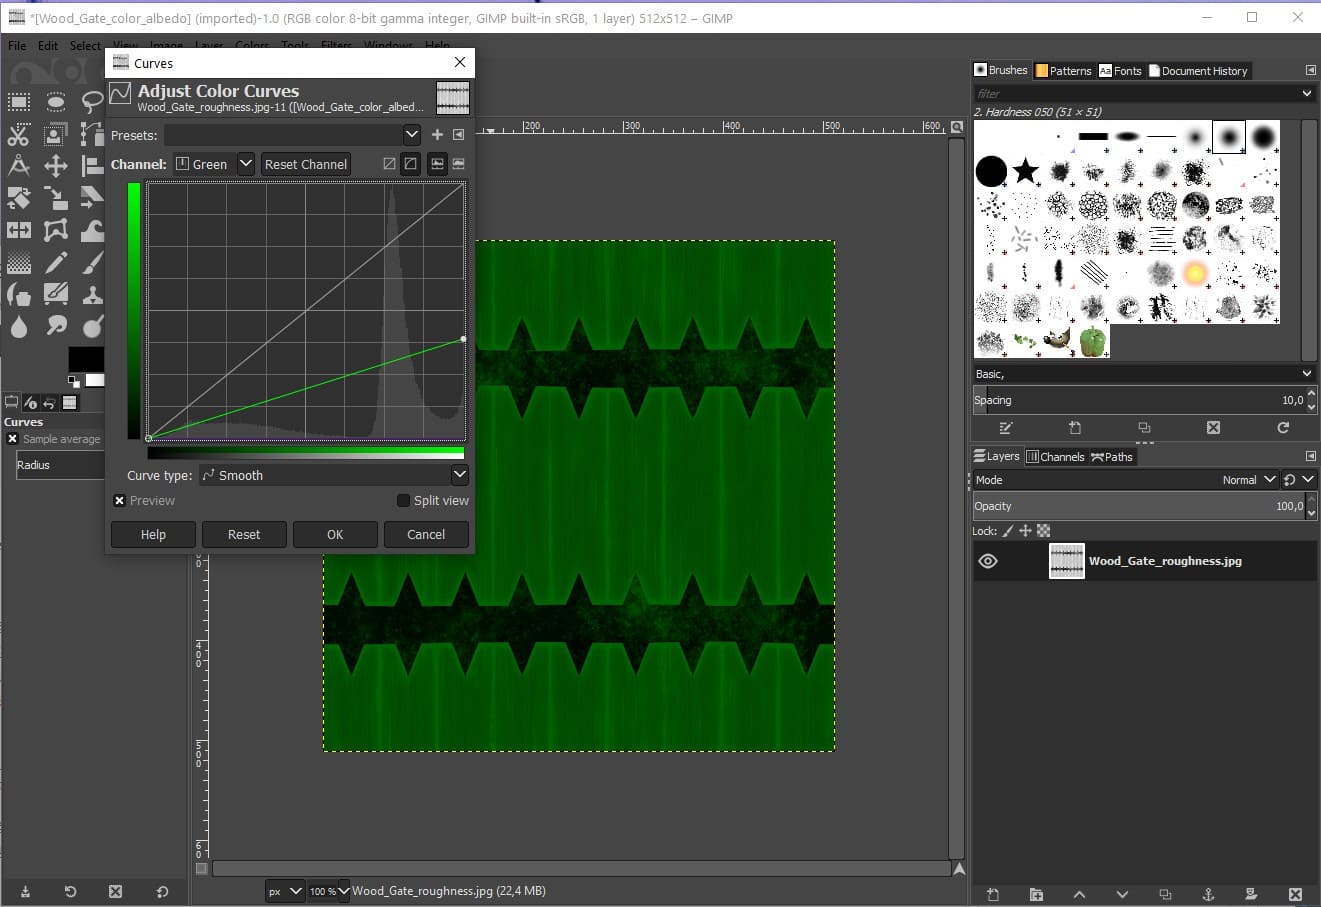

You can also implement the color map in the emissive field in room editor. The result is not guaranteed but it can save you time and increase performance by reducing the number of textures that need to be loaded.
Emissive maps in Chathouse feature a very useful intensity slider.
Resources
https://www.textures.com/
https://3dtextures.me/
https://polyhaven.com/textures
https://www.sharetextures.com/textures/
https://ambientcg.com/list?type=PhotoTexturePBR,AtlasPBR,DecalPBR
https://compressor.io/
https://www.iloveimg.com/compress-image
https://www.gimp.org/downloads
Normal map plugin for GIMP
https://drive.google.com/file/d/1wcJoJ-fXieB7aPu8rLRRqzOHQr2hwyUq/view?usp=sharing
https://www.thrixxx.com/gamerotica
https://www.thrixxx.com/profile/34185462/VelvetCrimson/myshares/1643018
https://www.thri.xxx/profile/19166005/IuliusCaesar/myshares/1659346
https://www.thri.xxx/profile/19166005/IuliusCaesar/myshares/1659342
https://www.thri.xxx/profile/19166005/IuliusCaesar/myshares/1659342
Contributors
